Securing a shipping label properly is crucial for smooth delivery and tracking. As a small business owner, you want your packages to arrive quickly and intact. Follow USPS guidelines to make sure your label stays legible and scannable throughout the journey. This guide covers what materials to use, how to place your label, and best practices for taping it on. Proper labeling and sealing prevent lost packages and scanning errors, keeping both you and your customer happy.
Materials You’ll Need
- Shipping label: Either printed on sticker paper or plain paper (with inkjet or laser printer).
- Box: A sturdy corrugated cardboard box. Remove or cover any old labels and logos first.
- Clear packing tape (transparent tape): 2-inch (48mm) wide heavy-duty tape is ideal.
- Reinforced or paper tape (optional): For extra-strong seams.
- Scissors or tape dispenser: To cut tape cleanly.
- Permanent marker (for return address): Black ink that won’t smear.
- Custom printed tape with logo: A great branding touch on box seams, as long as it doesn’t cover the label.
- Stretch film (pallet wrap): Used for securing multiple boxes together. Not needed for a single label.
- Do NOT use: Masking tape, cellophane tape, string, cord or twine on your label or seams. These can peel off or jam sorting machines.
Step 1: Prepare and Seal Your Box
- Choose the right box: It should be sturdy with all flaps intact. If reusing a box, obliterate or remove any previous labels, addresses, or barcodes so only the new label is visible.
- Fill with cushioning: Pad fragile items (peanuts, bubble wrap, etc.) so contents won’t shift.
- Seal seams with tape: Use 2-inch clear packing tape (or reinforced tape) to close the box flaps. Apply an “H” pattern: one strip over the center seam and one on each side seam. This reinforces the box against opening.
- Reinforce all edges: Run tape along all box edges and any weak points. Strong sealing tape, including transparent tape on seams, ensures the box won’t burst in transit.
Step 2: Print Your Shipping Label
- Address format: Write or type your return address in the upper left corner and the destination address below it, all on the same side. Keep it parallel to the longest side of the box. This orientation makes scanning easier.
- Printer options: You can print on special label stock or plain paper. USPS confirms that if you print on regular paper, “you don’t need special label sticker paper; you can use regular printer paper—just tape the printed label to your package with clear packing tape.”
- Trim if necessary: Cut any excess white margin so the label fits flat without folding.
Step 3: Position the Label on the Box
- Choose the largest side: Always place the label on the flattest, biggest panel of the box. This maximizes scanner visibility.
- Parallel to the longest side: Write or affix the label so the address is parallel to the box’s longest dimension. This complies with USPS addressing guidelines.
- Don’t fold or overlap: The label must lie completely flat. Avoid sticking it across a crease or edge. Do not fold the label or let it wrap over corners.
- Keep labels together: If you have multiple labels (e.g. customs forms or a sticker mailer), put them all on the same side without overlapping.
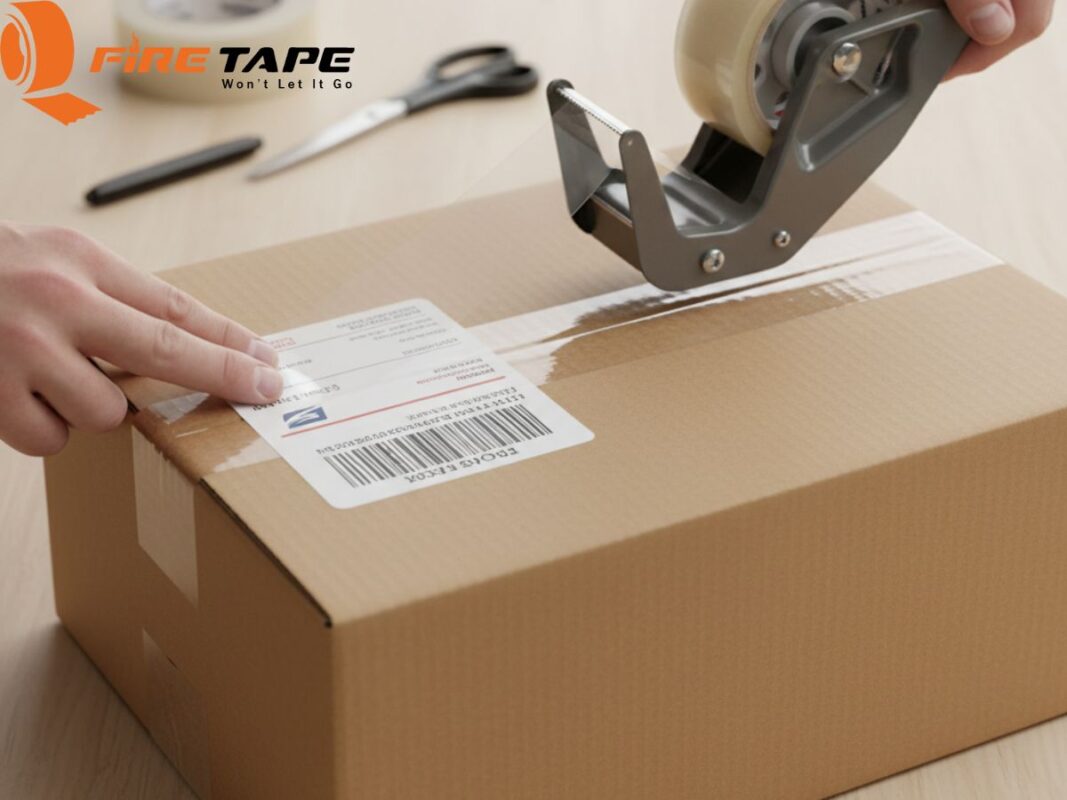
Step 4: Tape the Shipping Label Securely
- Cover with clear tape: Use clear packing tape to affix the label. Place strips on all four edges of the label and a piece across the middle. The tape should fully adhere around the perimeter of the label to secure corners and prevent peeling. A single strip along each edge, plus one lengthwise, is a common method.
- Protect the label: A strip of transparent tape over the entire label (except the barcode) shields it from rain or smudging. Make sure the tape is flat and wrinkle-free.
- Barcode caution: USPS advises not to cover barcodes or stamps with tape. In practice, if you do use clear tape over the barcode, it often scans fine, but to be safe many shippers leave a small strip of tape-free space across the barcode so reflectance doesn’t interfere. If you’re concerned, you can cover only the sides of the label and leave the center barcode area uncovered.
- Don’t obscure info: Ensure all address lines and any postal markings remain fully visible through the tape. It’s best to use truly clear tape; yellowed or heavily colored tape can make scanning difficult.
Step 5: Final Checks Before Shipping
- Legibility: Stand back and verify the entire label is flat, readable, and scannable. All text should be unwrinkled and the barcode unobstructed.
- Inside copy: Place a copy of the shipping and invoice information inside the box as a backup, in case the exterior label gets damaged.
- Book your pickup or drop off: Your package is now ready for USPS pickup or handoff. If you used Click-N-Ship, schedule a carrier pickup or drop it at a blue collection box (if it’s under 10 oz and flat).
Tips: Tape Types and Best Practices
- Clear packaging tape: Also called transparent tape, this is the preferred tape for labels. It won’t obscure printing or codes. 3M’s Scotch® packing tape is a popular choice.
- Reinforced paper tape: Heavy boxes may benefit from water-activated paper tape on seams (it has a stronger bond). It’s one of the “reinforced tapes” USPS recommends.
- Custom/Branded tape: Many businesses use custom tape with logo to brand their shipments. This branded tape should be applied to box edges or logos – just keep the label area free for the address and barcode. For example, eBay even sells its own branded tape.
- Stretch film: Use stretch film (pallet wrap) when bundling multiple packages on a pallet. It’s not typically used just for a single box and label.
- Avoid masking tape: Masking/painter’s tape is not recommended on packages. It does not stick as well long-term, can peel in transit, and is explicitly discouraged by USPS.
- No duct tape on labels: Duct tape leaves residue and is not approved by USPS for labeling or sealing. Stick to the clear or brown tapes mentioned above.
Conclusion
Taping your USPS shipping label correctly is a small step that makes a big difference. By placing the label flat on the largest side of your box and covering it neatly with clear tape, you protect crucial shipping info from damage or moisture. Following USPS guidelines (like parallel placement and using 2″ clear tape) helps automated scanners read your label without delay. With careful taping and good materials, your package will be clearly addressed and securely sealed, ensuring it reaches its destination smoothly. Proper labeling saves you headaches and keeps your customers happy with timely, intact deliveries.